Optimize Images for Website Design
by Cedar Studios • 11/18/2023
Web Design
Modern browsers are built to host optimized image formats, like webp, that can massively speed up your website and keep users on the page. In the post, I’ll show Mac developers how they can write an automation to optimize images for their website designs with a single keystroke.
TIP
Be sure to familiarize yourself with The 6 Types of Website Graphics and How to Format Images for Website Design
WARNING
This is a technical post for developers. If that’s not you, let us take care of your website development.
Watch the Tutorial
INFO
Find the files on our Github page.
Optimizing Images with Automator
How do these automations work?
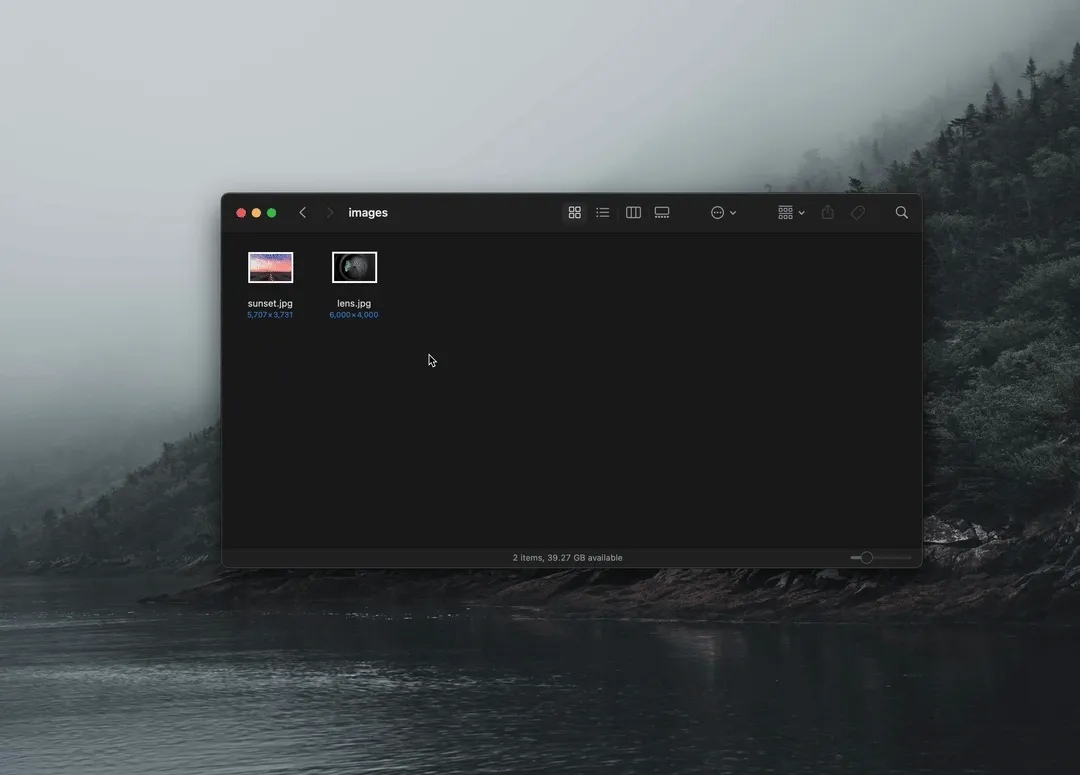
You can simply select any image file(s) in Finder and launch the automation with a custom keyboard shortcut or through the Quick Actions menu:
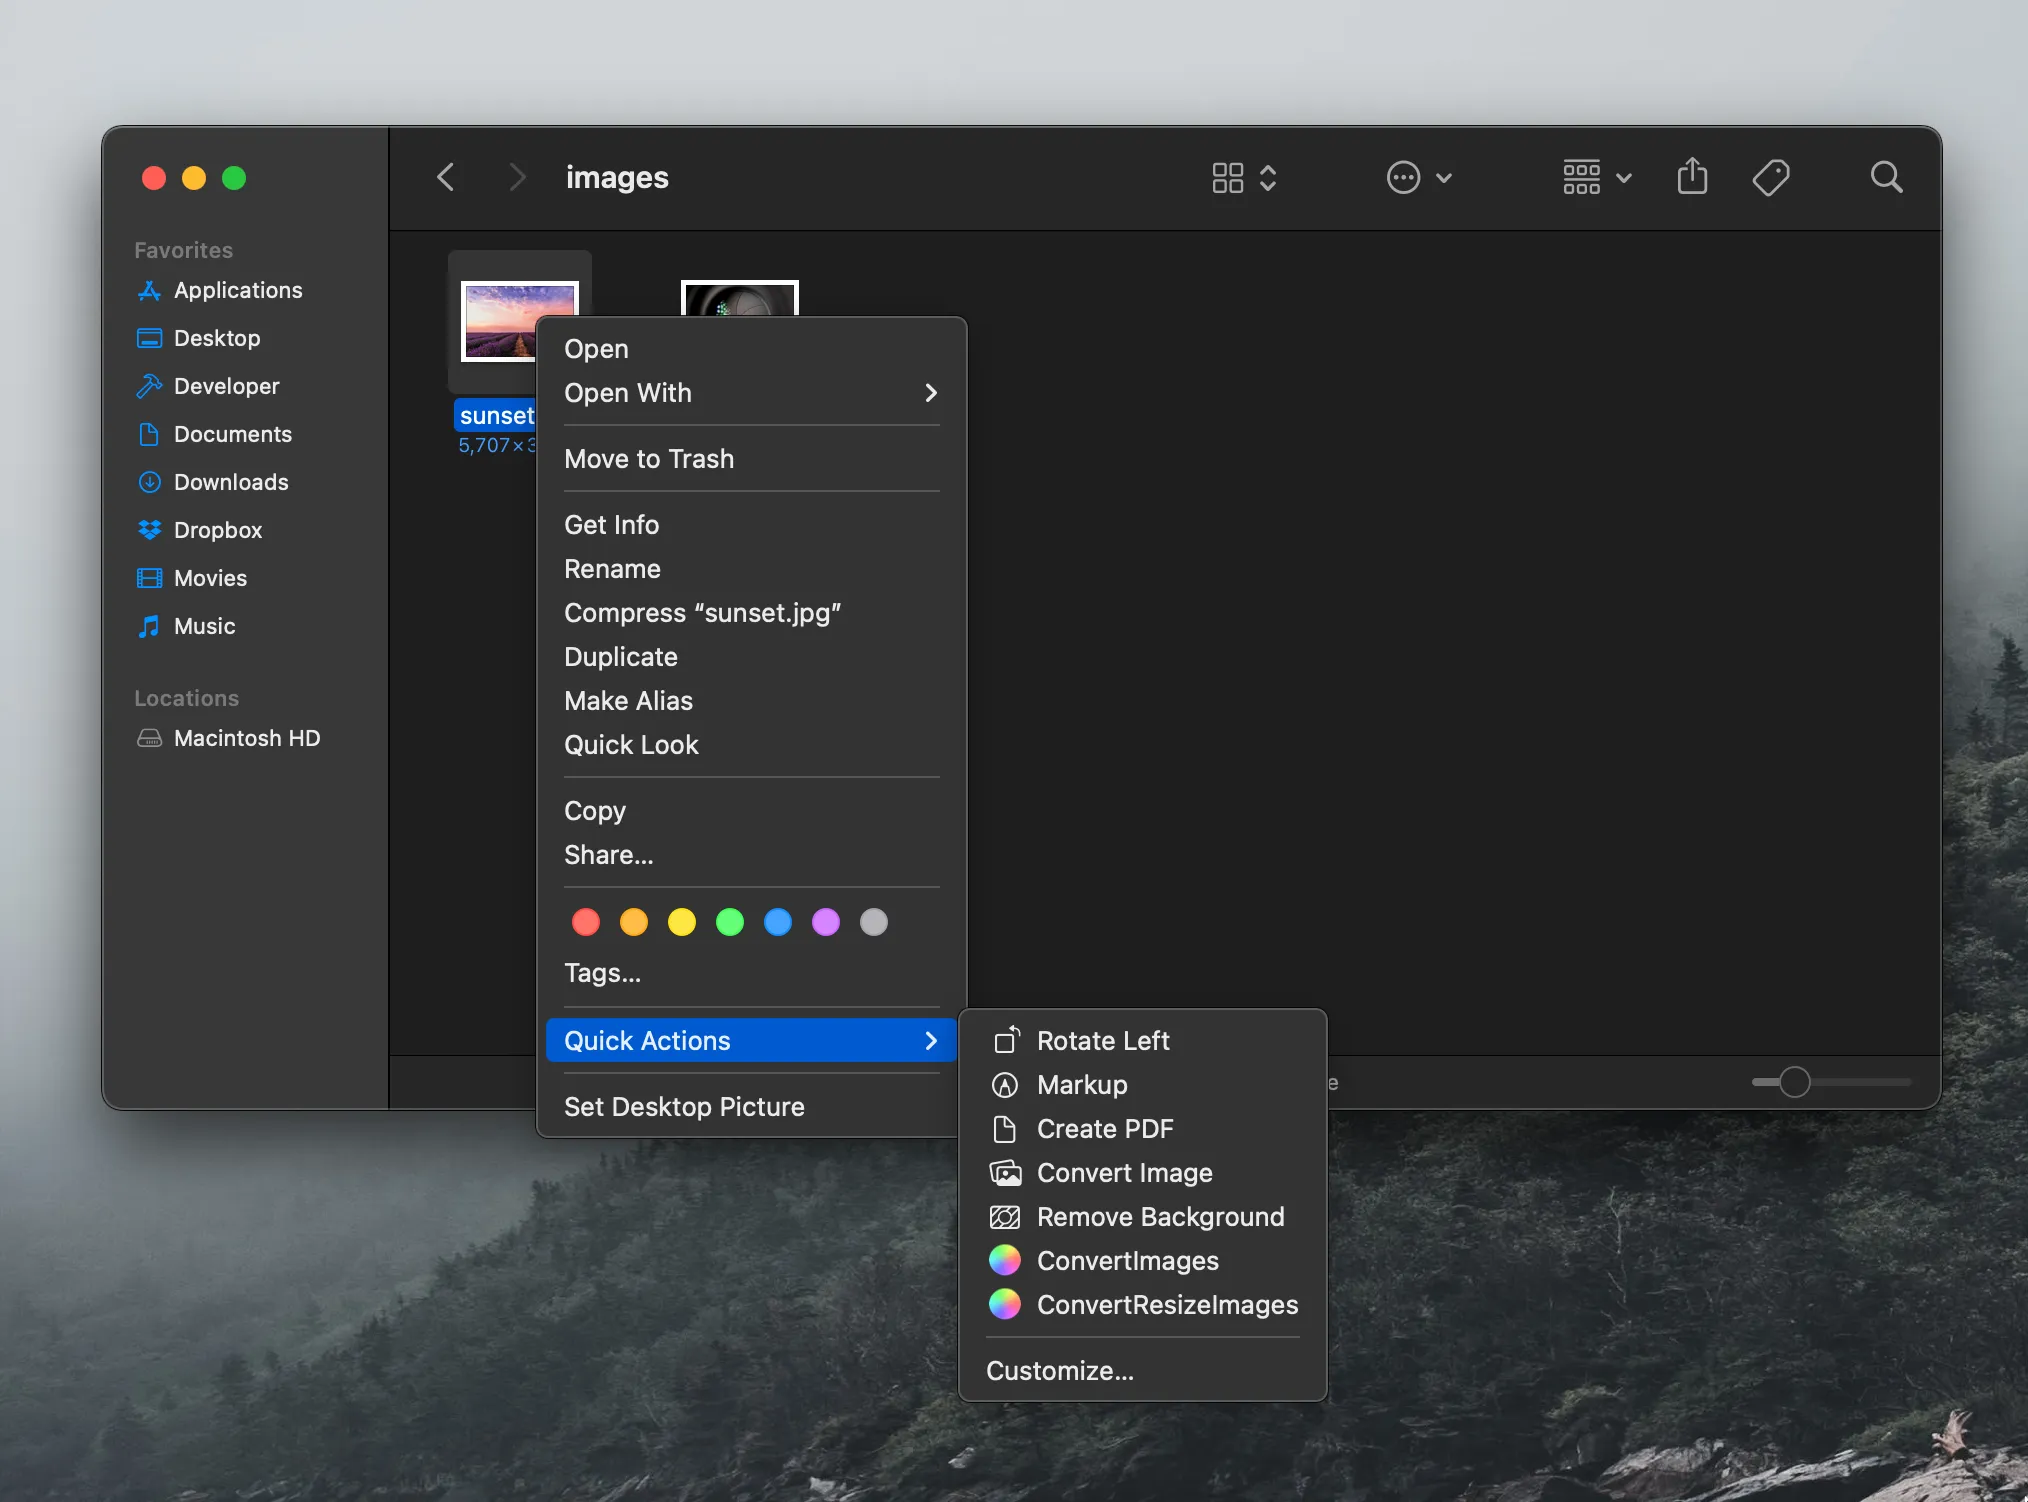
1. ConvertImages
This is the simpler automation.
With a single keyboard shortcut (we like to use ⌘ + ^ + W), all selected images will be converted to .webp format and stored alongside the original image.
2. ConvertResizeImages
This automation will resize the image before conversion.
There are three use cases:
No width is entered—the automation falls back to
ConvertImagesand converts but, does not resize, the images.A width, but not a height, is entered—the image is resized to the selected width. The height is automatically calculated based on the aspect ratio of the original image.
In the gif at the top of this post, the height is not entered and the dimensions of the image scale from
6000x4000to2000x1333.A width and a height are entered—the image is scaled according to the object-fit: cover directive in CSS.
With just a single keystroke, you will be able to resize and optimize your web design images in a modern .webp format!
Installation
Below are the instructions for the ConvertImages automation. Simply repeat the steps with the ConvertResizeImages files from our Github to install the second automation.
Install the dependencies,
nodeandsharp, on your machine.In terminal, enter:
brew install node

npm i sharp -g
Open Automator and make a new Quick Action
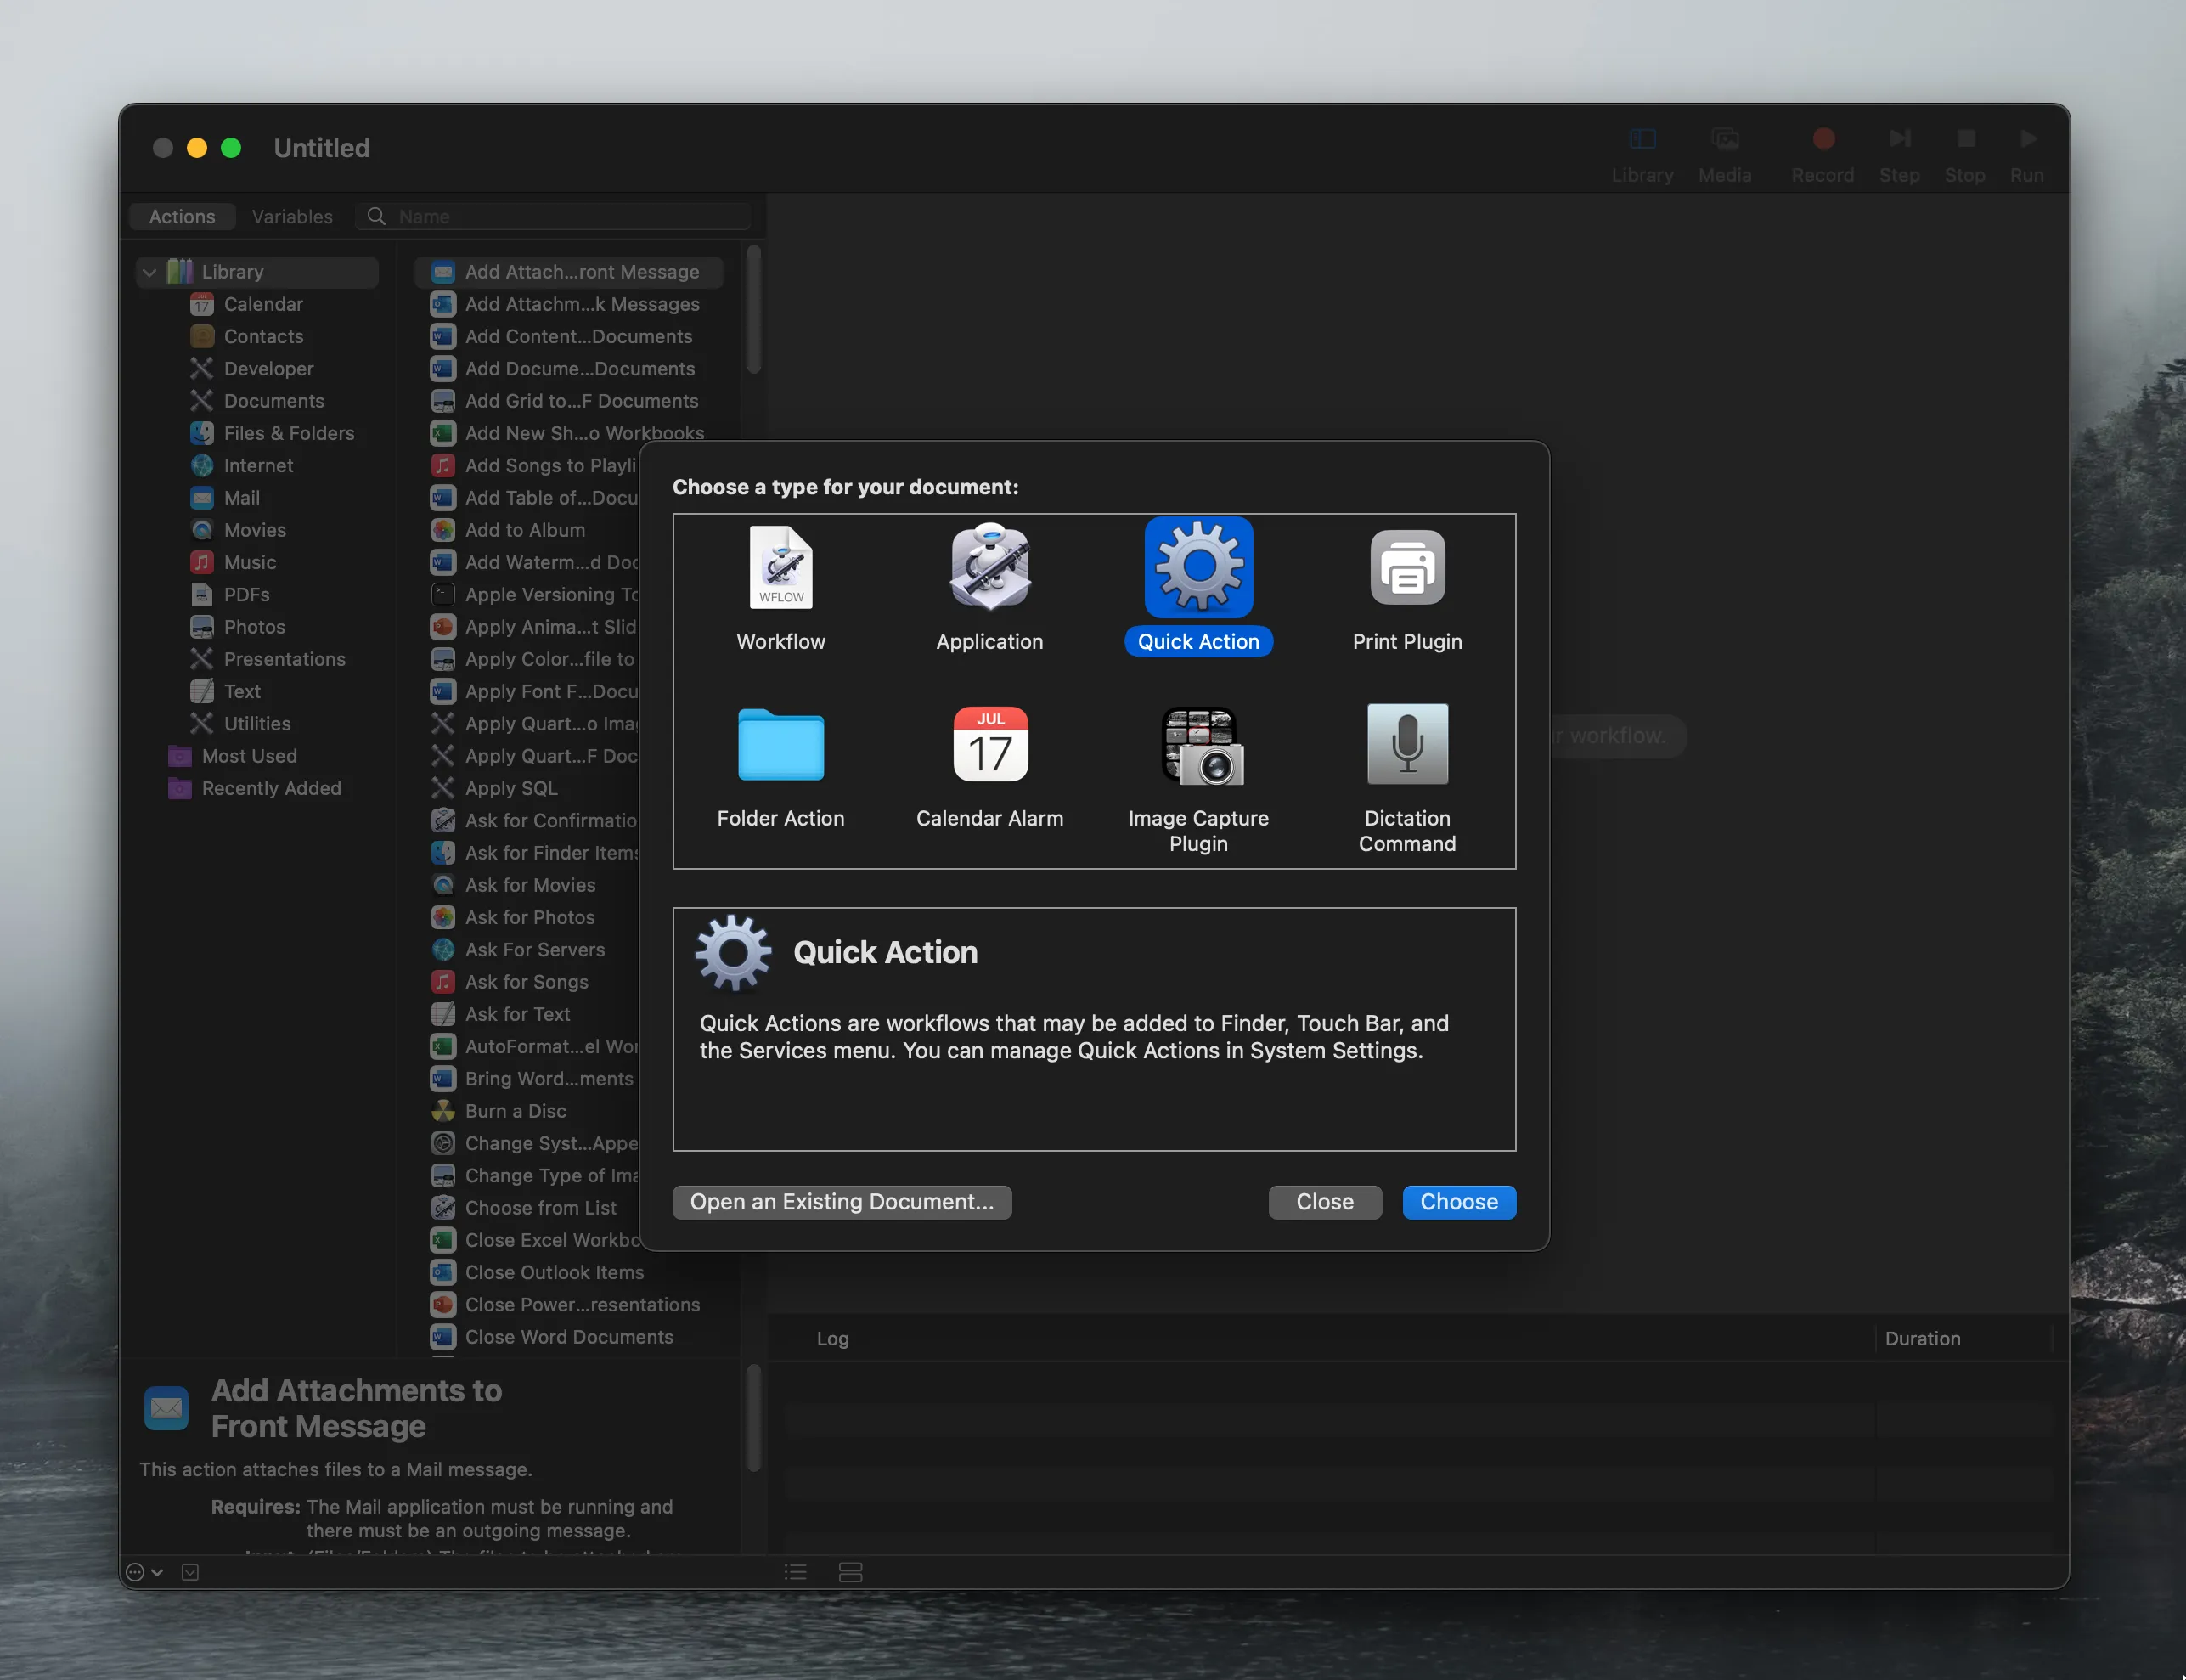
- Change the
Workflow receives currentproperties toimages filesandFinder.
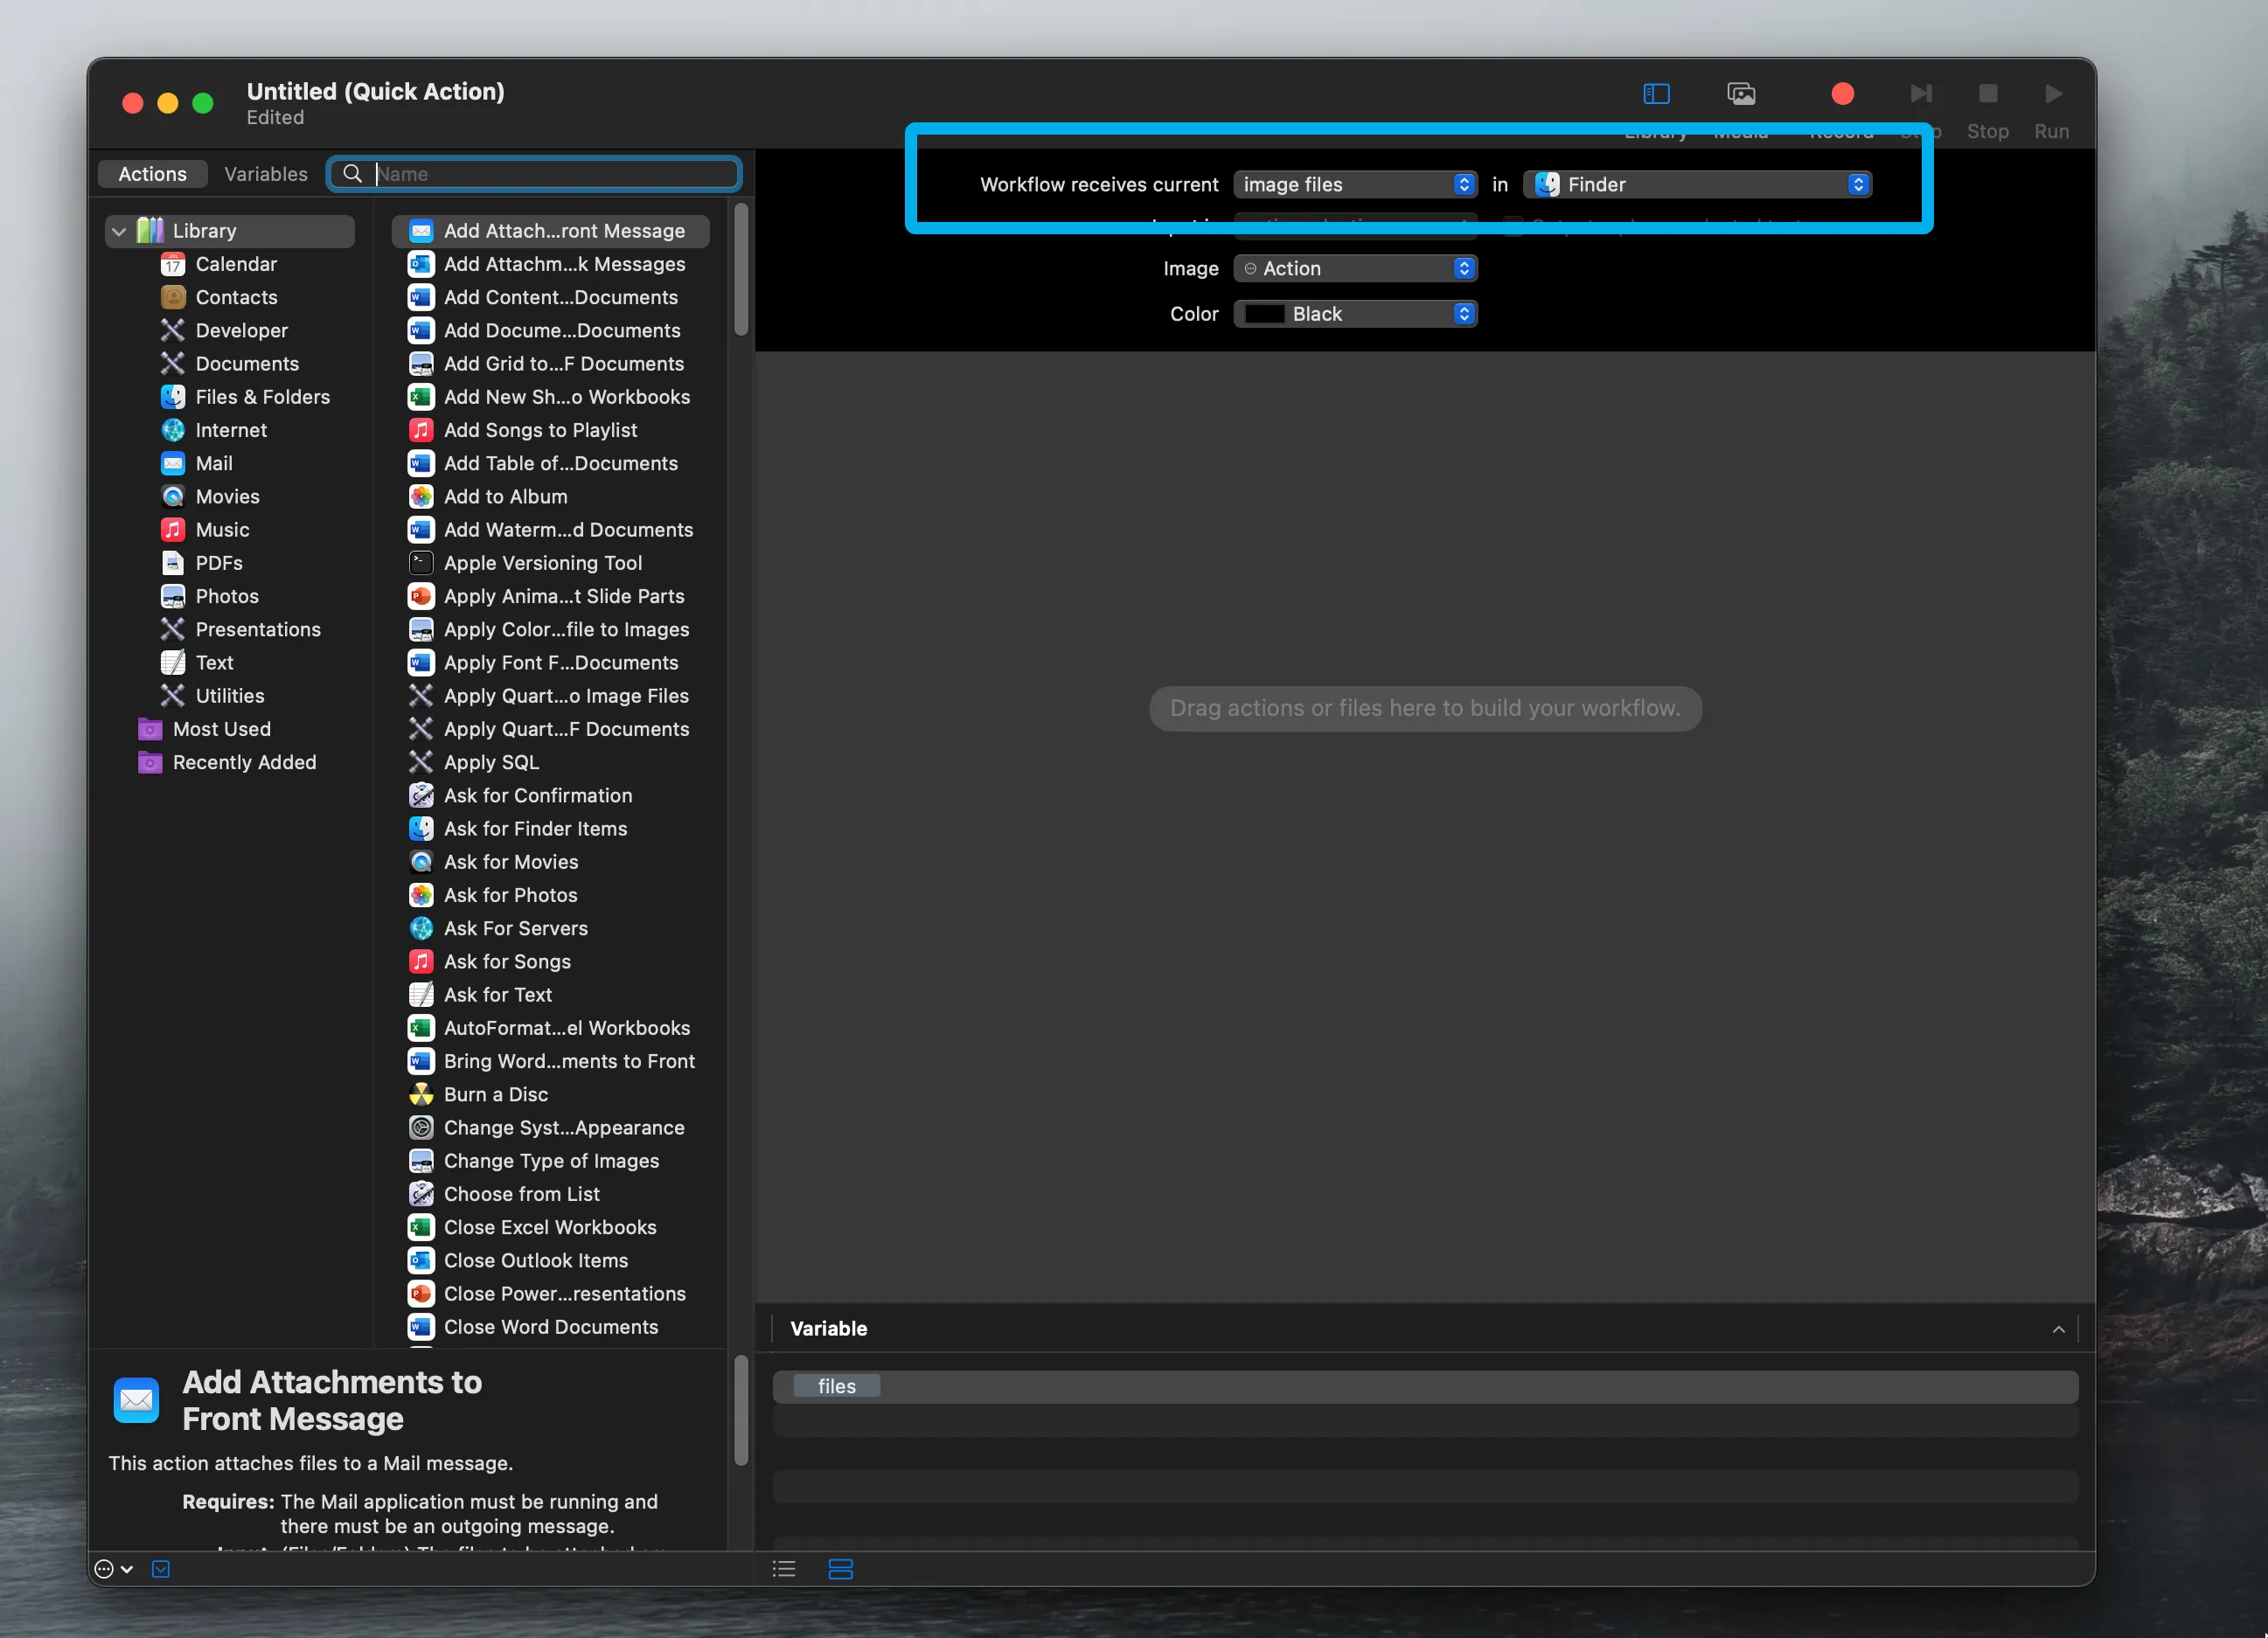
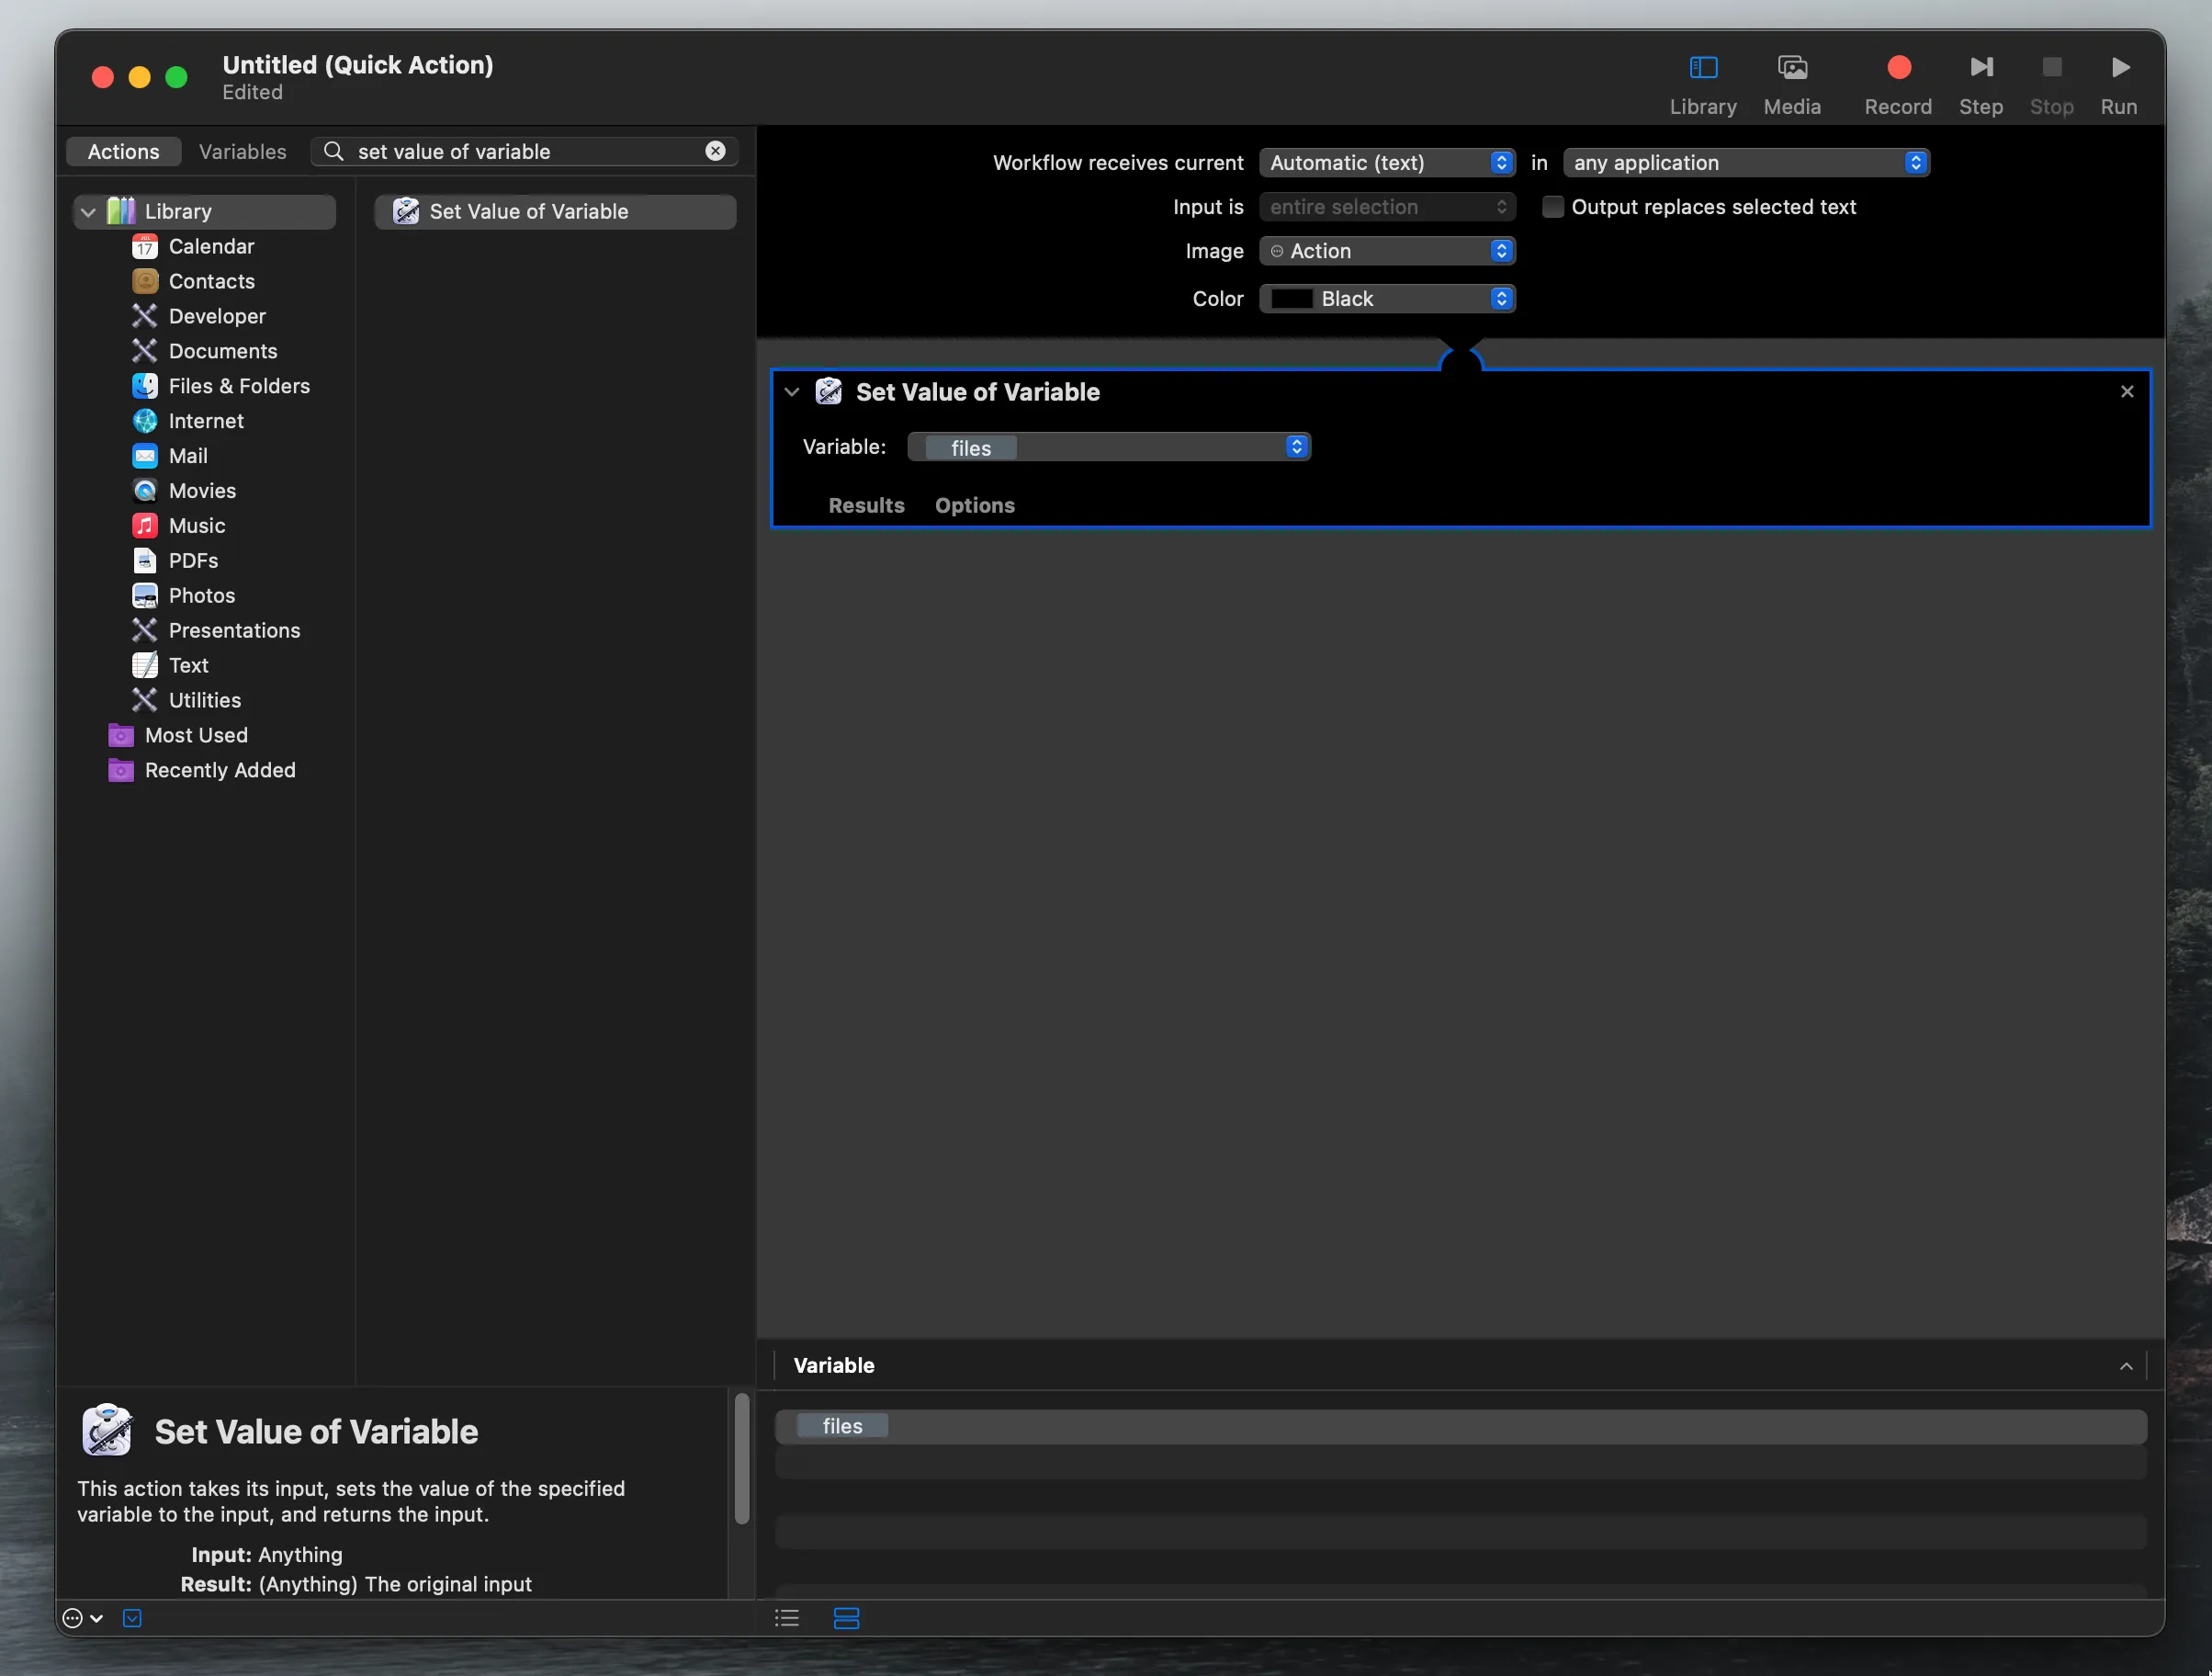
- Add a
Set Value of Variablestep. Create a new variable and name it “files”.
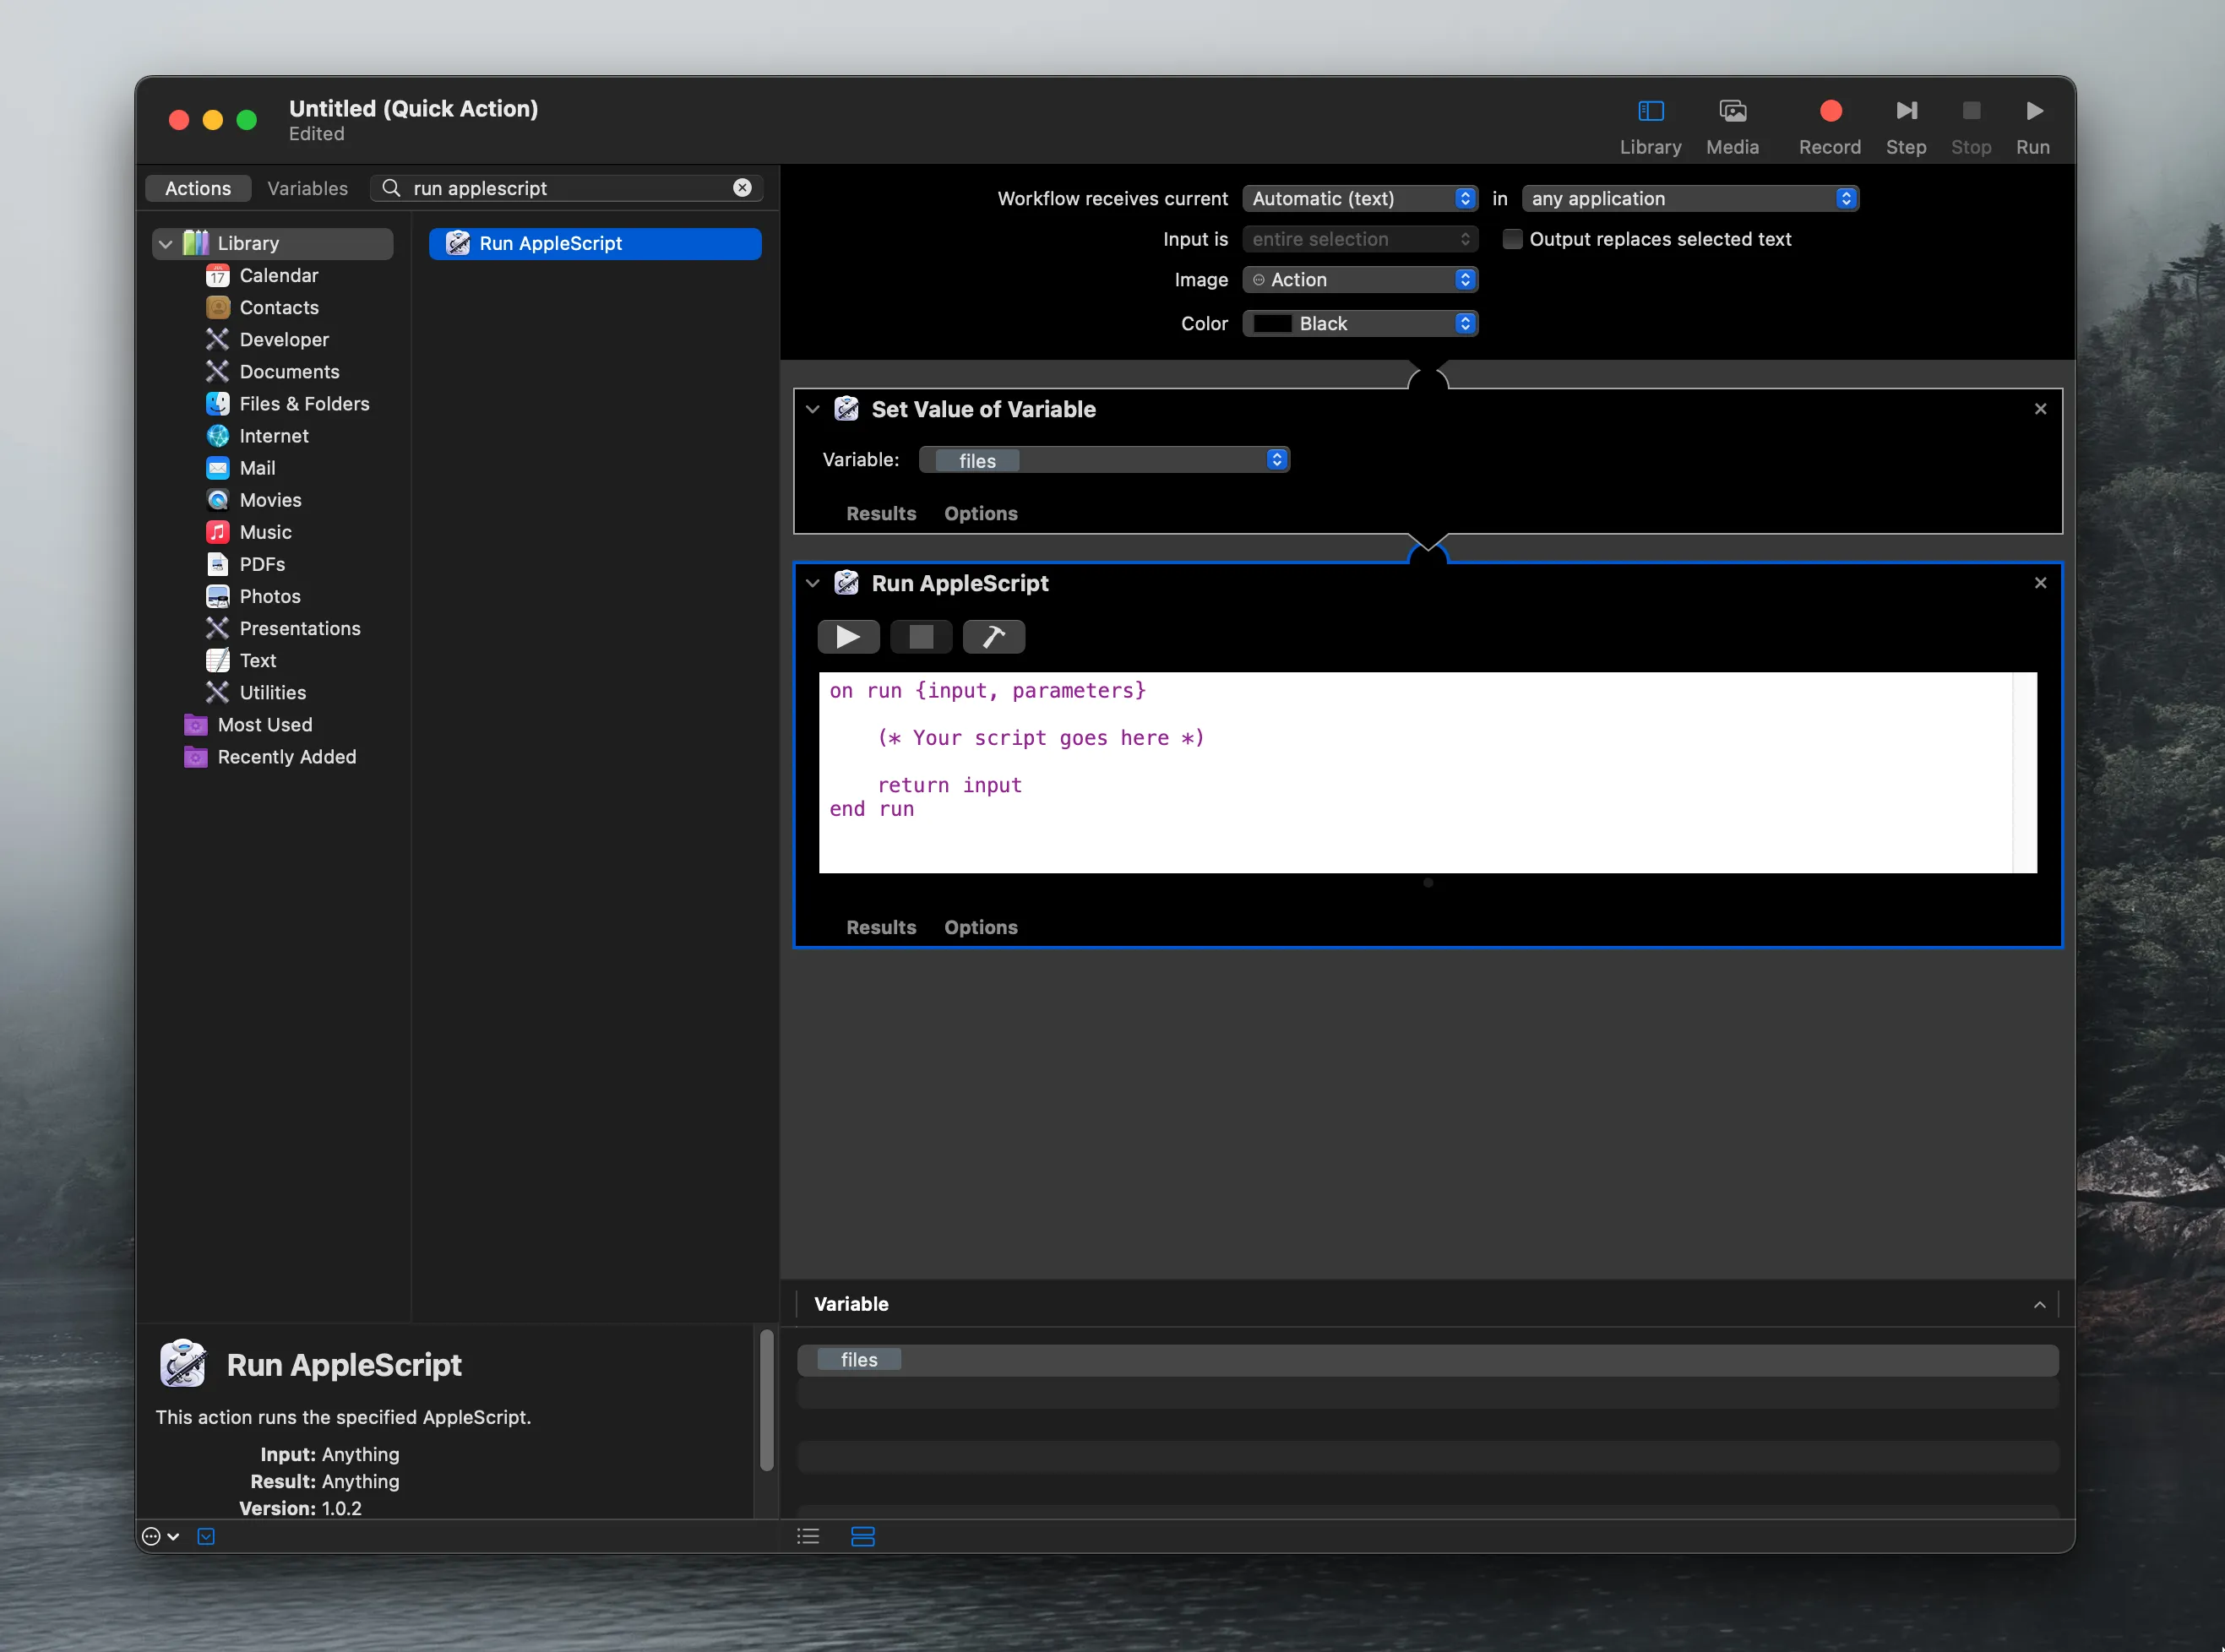
- Add a
Run AppleScriptstep. Paste in the contents ofconvert-images/convert-images.scpt.
convert-images.scpt
on run {input, parameters}
  -- convert files to comma-delimited list
	set AppleScript's text item delimiters to ","
	set fileList to {}
	repeat with i in input
		set end of fileList to quoted form of POSIX path of (i as text)
	end repeat

  -- replace node path if necessary
	do shell script "/opt/homebrew/bin/node ~/convert-images.js " & fileList as string

	return input
end run
Name and save your Automation (e.g.,
ConvertImages).Place the
convert-images/convert-images.jsfile in your/Users/<name>/folder.
Your automation should now appear in the Quick Actions menu!
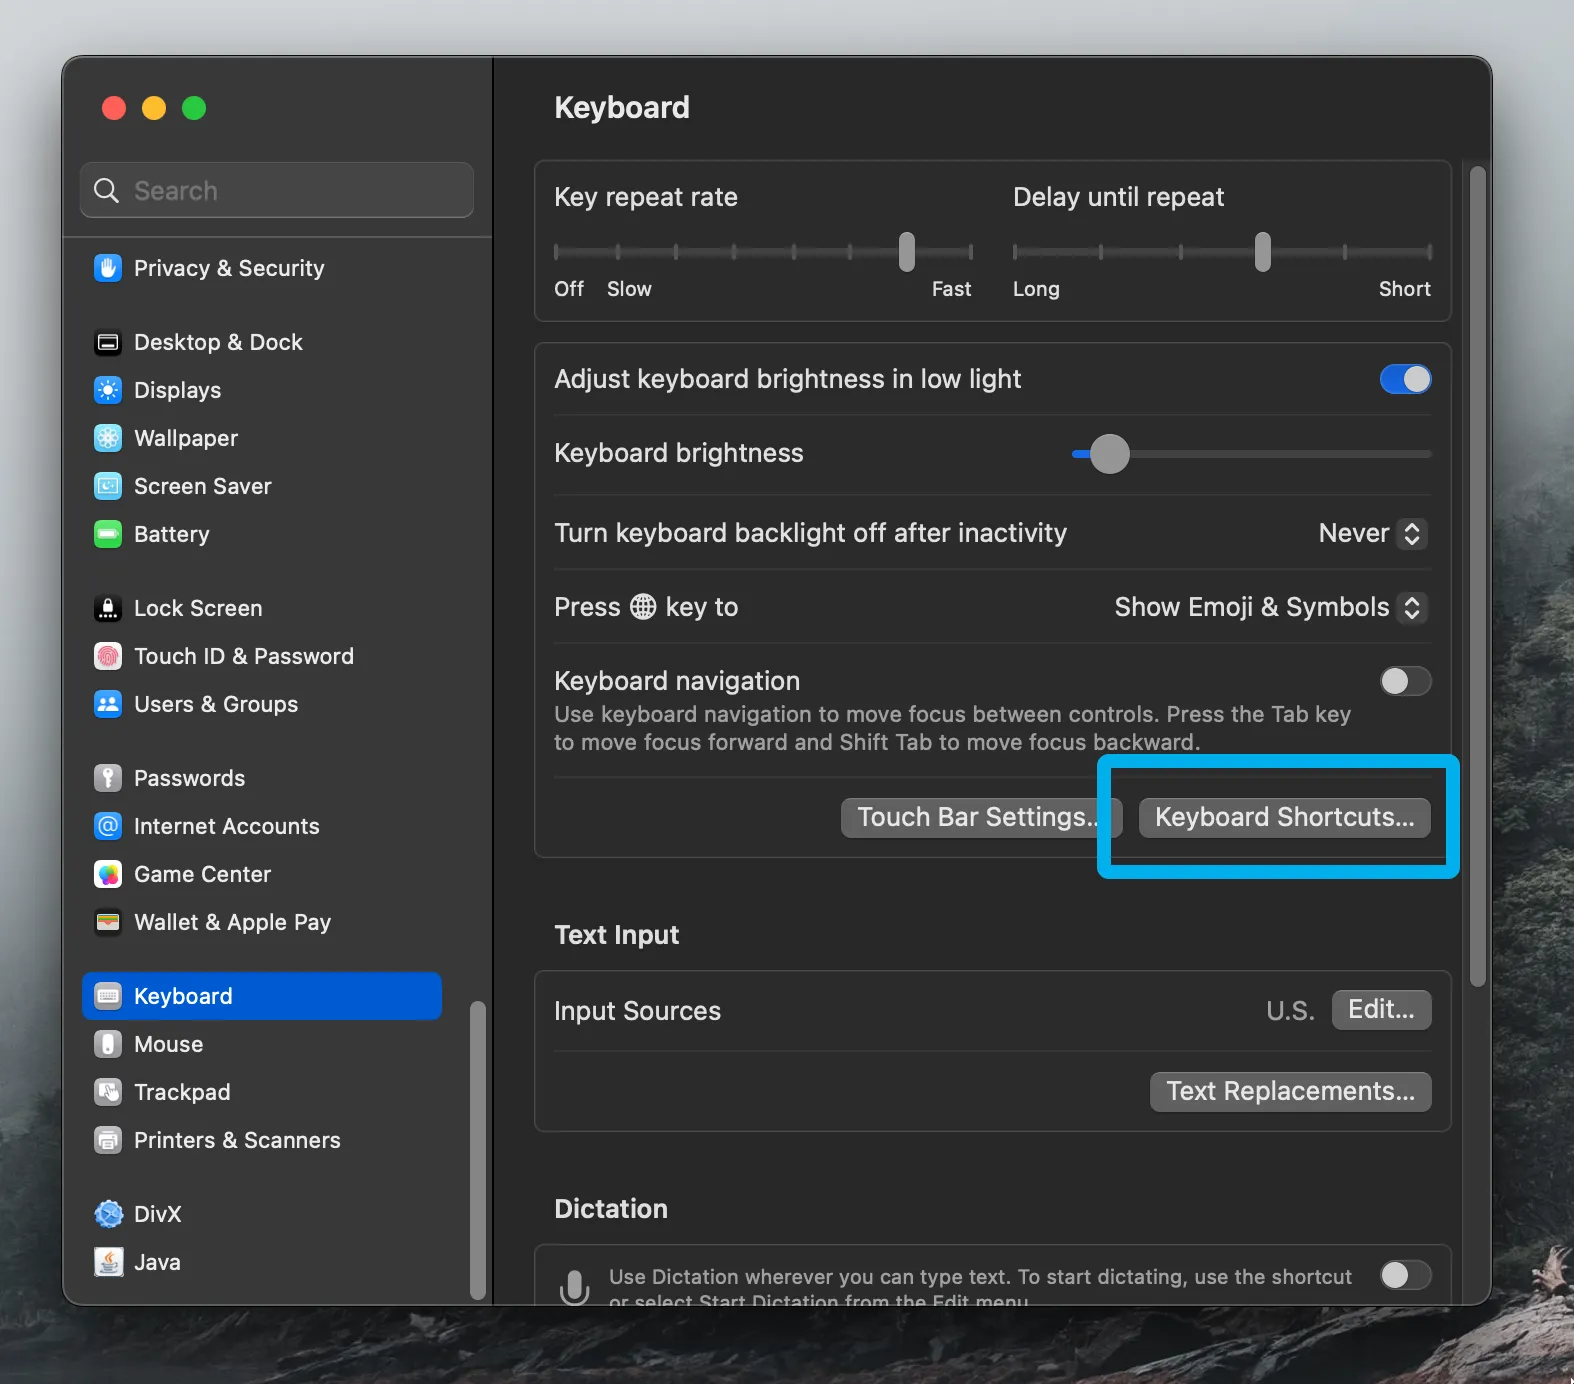
- [Optional]: Map this to a keyboard shortcut by going to
System Settings > Keyboard > Keyboard Shortcuts > Servicesand giving it a unique keyboard shortcut.
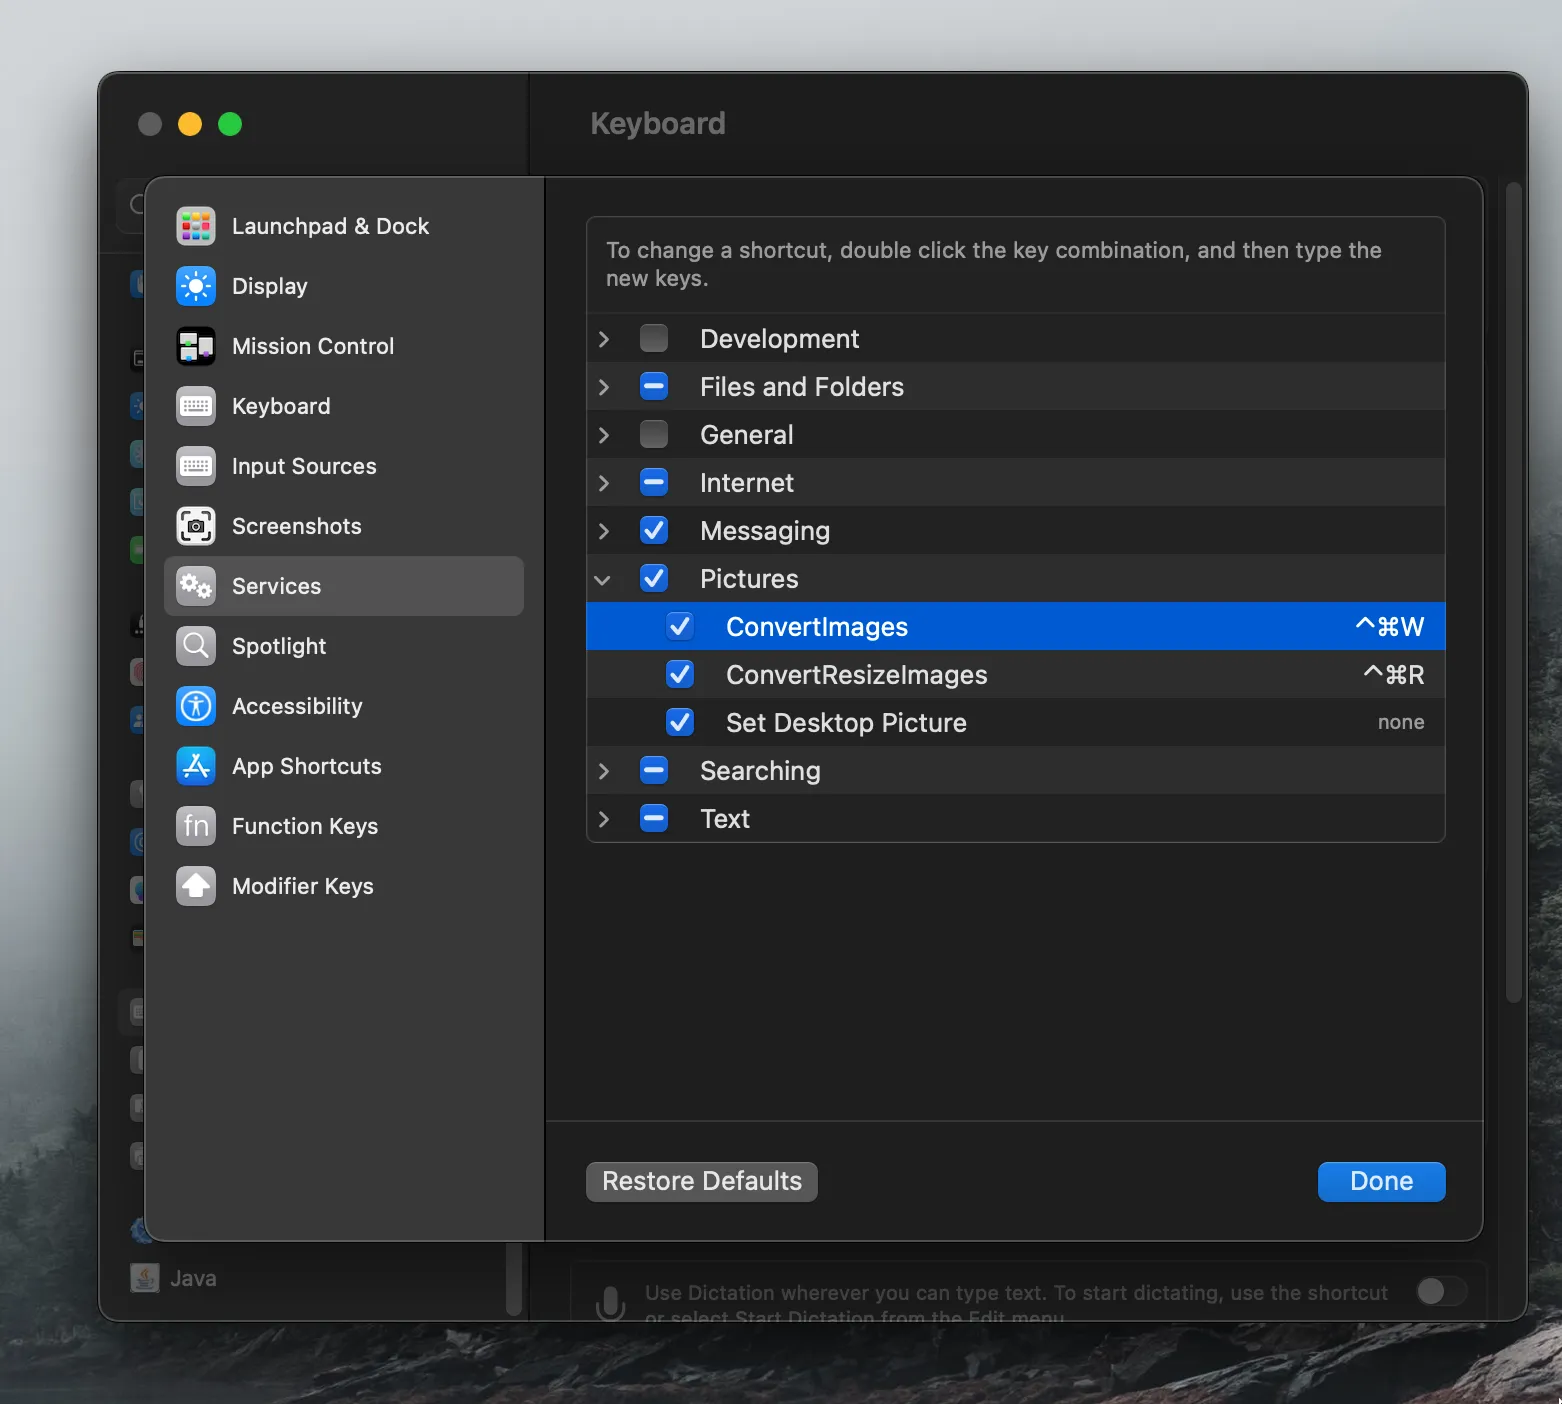
Now you can convert images simply by selecting them and clicking ⌘ + ^ + W !
Conclusion
Optimizing images for website design can be a time consuming process. This script-approach to automating image optimization saves us hours as we develop websites for Cedar Rapids small businesses.
